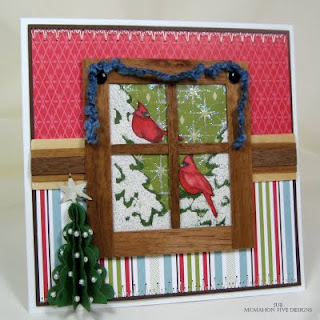
 Welcome to Tutorial Part 1 of 2. The card above was a the Cardinal digi printed on designer paper, colored and embossed to what you see here. Grab a couple of your favorite beverage and read along! If you have any questions, please email me or post them below. Part 2 of 2 will be posted tomorrow. Same time, same place! :)
This is a before shot of the Stampin Up Designer paper I used to print the Cardinals on. It was 12 x 12 and I did cut it down to 8-1/2 x 11 to fit in my printer.
 It is hard to see, but it's there. This image works well for this technique since the majority of it was embossed.
 I printed 2 images side by side on the green paper and then also on white card stock. I wanted to cut the cardinals out so they did not have the green star pattern on their bodies.
First, I colored the pine needs with Copics G28. Then I used my super OLD embossing pen that I love to put the embossing fluid where I wanted my embossing powder to stick. It has a blue tint so you can see where I used it. Yes, I hate to admit it but this pen has to be about 10 years old!

I poured on Snowflake Embossing Tinsel, shook the excess back into the container and heat set the glittery powder.
I added Star Dust Stickles to the star shapes on the background designer paper.

Here, I colored the Cardinals on the White card stock with Copics R27 and blended with the Colorless blender. I cut them out with my craft knife and glued them in place.

Here, I colored the Cardinals on the White card stock with Copics R27 and blended with the Colorless blender. I cut them out with my craft knife and glued them in place.
I used Scor-Tape to frame the image.
This completes Part 1 of 2. Tomorrow I will show you how I made the real wood window frame.
Have a wonderful day!!


5 comments:
your card is absolutely gorgeous and your tut is super. thank you so much for sharing it with us.
hugs,
I love your card. Your tutorial makes it sound so easy.
This is so cool! TFS and taking the time to make the tutorial for us.
Really pretty card and you make it sound so easy to do! Thanks for sharing it
R/
Thanks for sharing such a beautiful technique!
Post a Comment